Bundle your Front-End with Webpack
Bundle your Front-End with Webpack
Peter Cho | Senior Developer
June 13, 2016
In an age where mobile devices are prevalent but public wifi isn’t robust enough to be reliable, performance is important. Despite faster connections, developers still must focus on designing their systems to be as optimal as possible to ensure quick and reliable delivery to their consumers.
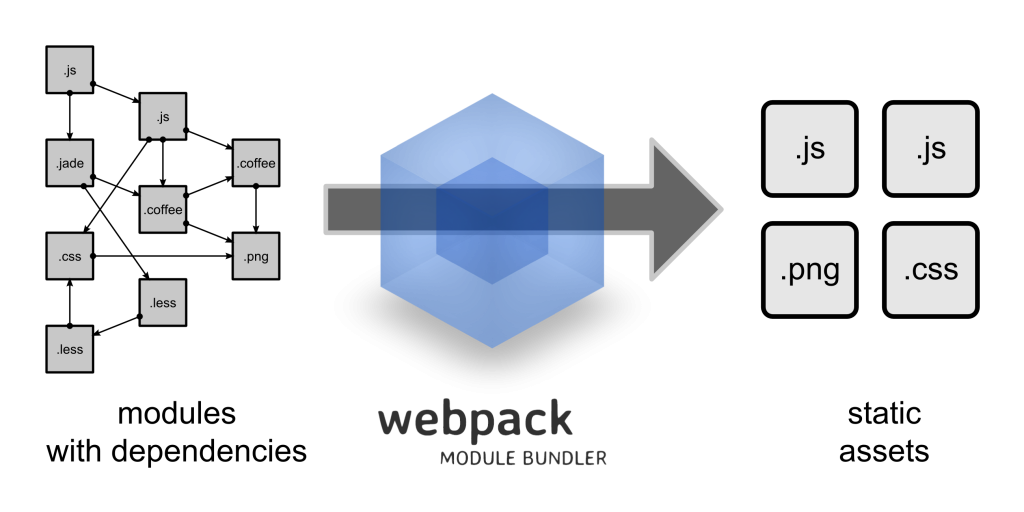
Luckily, we have webpack to aide us with this problem. Though daunting and sometimes confusing, when harnessed correctly, you can make it do some really awesome tasks to your static assets, like bundling javascript, css, html, and pngs in one file (yes, one file!) and optimizing them by minification.
The Basics
If you have never used webpack or have tried and failed in the past, read on. This tutorial intends to answer some implementation questions on some of the most common uses of webpack that makes it amazing.
Before you do anything, make sure you have webpack installed:
npm install --save-dev webpack
With that out of the way, take a very basic webpack.config.js file:
'use strict';
const webpack = require('webpack'),
path = require('path');
let config = {
entry: myPage: './myPage.js’,
output: {
path: './dist',
filename: 'bundle.js'
},
};
module.exports = config;
It’s pretty easy to understand: you pass in the files you want webpack to process within entry and the processed outcome gets thrown into a directory called “dist” as “bundle.js.” Every time you run “webpack” in the command line, a new file will show up there.
You’ve taken your first step at creating a workflow for your static front-end assets. However, it doesn’t really do enough to warrant its value…yet.
Multiple File Entries
What if you have multiple files? Since the parameters to pass into your webpack configuration is a JSON file, it’s as easy as adding another entry to the entry object.
'use strict';
const webpack = require('webpack'),
path = require('path');
let config = {
entry: {
myPage: './myPage.js',
myPage2: './myPage2.js',
myPage3: './myPage3.js'
},
output: {
path: './dist',
filename: 'bundle--[name].js'
},
};
module.exports = config;
Notice how output has [name] added to the filename. This allows webpack to map individual bundles to their respective keys in the entry (in this case, we will have “bundle–myPage.js”, “bundle–myPage2.js”, and “bundle–myPage3.js” in our /dist directory).
Combining Assets into Single Bundles
What if you want to jam ten files into one easy-to-serve bundle. This especially becomes useful if your project demands you to eliminate round trips to improve browser performance, especially in old Internet Explorer browsers.
You can do this simply by combining entries into a single entry key.
'use strict';
const webpack = require('webpack');
let config = {
entry: {
myPages: [
myPage: './myPage.js',
myPage2: './myPage2.js',
myPage3: './myPage3.js'
]
},
...
output: {
path: './dist',
filename: 'bundle--[name].js'
},
};
module.exports = config;
The above configuration will generate a single bundle called “bundle–myPages.js” including assets from the three files in the array. Useful if you want to organize your stuff in logical bundles.
Poll All Static Assets in a Directory
It may be tedious to add a file to the entry object everytime you create a new file. Not only does it add an extra step for the developer in an unfamiliar framework, it also could add a lot of technical debt due to lack of knowledge.
Gladly, webpack.config.js is a javascript file that nodejs can interpret, so you have plain javascript and the npm ecosystem to simplify your workflow. In my case, I prefer to use the glob module to seek through a directory and add all the files for me. To do this, first install:
npm install --save glob
..and add it to your entry array like this:
const webpack = require('webpack'),
glob = require('glob');
let config = {
entry: {
// You don't need the following anymore...
// myPages: [
// myPage: './myPage.js',
// myPage2: './myPage2.js',
// myPage3: './myPage3.js'
//],
// Auto-detect all pages in directory.
'myPages': glob.sync('./path/to/**/*.js'),
},
...
Webpack should now pick up all files in the directory you want it to poll and drop the code into bundle–myPages.js. Of course, take care what logic you incorporate in your config file so you don’t pick up changes to the wrong files.
Loaders Galore!
By default, webpack assumes all your files are javascript, but one of the big benefits of webpack is that it can load in static non-javascript assets into the same bundle, as well. To do this, our configurations must know how to handle each type, including CSS, HTML, PNG, and SVG.
Identifying them is as easy as specifying loaders, which consists of a regular expression webpack needs to search for and the module you want it to use once it identifies the assets.
'use strict';
const webpack = require('webpack'),
glob = require('glob');
let config = {
entry: {
// Auto-detect all pages in directory.
'myPages': glob.sync('./path/to/**/*.js'),
},
module: {
loaders: [
// Javascript: js, jsx
{
test: /\.jsx?$/,
loader: 'babel-loader'
},
// CSS: scss, css
{
test: /\.s?css$/,
loaders: ['style', 'css', 'sass', 'postcss-loader']
},
// SVGs: svg, svg?something
{
test: /\.svg(\?.*$|$)/,
loader: 'file-loader?name=/img/[name].[ext]'
},
// Images: png, gif, jpg, jpeg
{
test: /\.(png|gif|jpe?g)$/,
loader: 'file?name=/img/[name].[ext]'
},
// HTML: htm, html
{
test: /\.html?$/,
loader: "file?name=[name].[ext]"
},
// Font files: eot, ttf, woff, woff2
{
test: /\.(eot|ttf|woff2?)(\?.*$|$)/,
loader: 'file?name=/fonts/[name].[ext]'
}
]
},
output: {
path: './dist',
filename: 'bundle--[name].js'
},
};
module.exports = config;
Note: You may have to install several more node modules to make the above configuration work. For example, babel-loader is needed to process javascript files (npm install –save babel-loader). The above displays a few variations of how you can specify the loaders you want to use.
Splitting out vendor assets
Third party packages can often be very big and bulky. Your javascript files may look something like this:
‘use strict’;
let jquery = require(‘jquery’);
let react = require(‘react’);
...
Webpack is intelligent enough to recognize and include these libraries as part of the bundle. However, if you have several pages with similar patterns, webpack will compile all the third party libraries into EACH bundle! This does not bode well because it makes static assets harder to cache and bundles unnecessarily large.
Ideally, we want to bundle the unchanging vendor files into its own bundle and have your custom code reference them, provided you include the files in your HTML code in order. Unfortunately, you cannot simply make modifications to the entry like above. You will also need to tap into the CommonsChunkPlugin plugin to parse the bundled assets in such a way where the namespacing of the included assets are consistent across all files.
So try this:
'use strict';
const webpack = require('webpack'),
glob = require('glob');
let config = {
entry: {
'vendor': [
'react',
'angular',
'jquery'
],
// Auto-detect all pages in directory.
'myPages': glob.sync('./path/to/**/*.js'),
},
...
plugins: [
// Pro-tip: Order matters here.
new webpack.optimize.CommonsChunkPlugin([‘myPages’, 'vendor'], 'bundle--[name].js')
]
};
module.exports = config;
Now you have consistent namespacing, and you can include your assets on your static HTML like so:
...
<script src=”bundle--vendor.js”></script>
<script src=”bundle--myPages.js”></script>
...
Compress and Minify ALL THE THINGS
To make your assets production ready without too much effort, you can tap into the ugilify plugin to remove all white spaces and minify your assets:
…
plugins: [
// Minify assets.
new webpack.optimize.UglifyJsPlugin({
compress: {
warnings: false // https://github.com/webpack/webpack/issues/1496
}
})
]
...
Ready to Go?
This article touches the surfaces of some of the things webpack can tackle. At first, you’ll notice that you will do a lot of initial configuration work when you first engage with webpack. Once you get it to a point it does everything you need it, it’s a feature that you pretty much set it and forget it (at least from my experiences).
Complete Configuration
'use strict';
const webpack = require('webpack'),
glob = require('glob');
let config = {
entry: {
'vendor': [
'react',
'angular',
'jquery'
],
// Auto-detect all pages in directory.
'myPages': glob.sync('./path/to/**/*.js'),
},
module: {
loaders: [
// Javascript: js, jsx
{
test: /\.jsx?$/,
loader: 'babel-loader'
},
// CSS: scss, css
{
test: /\.s?css$/,
loaders: ['style', 'css', 'sass', 'postcss-loader']
},
// SVGs: svg, svg?something
{
test: /\.svg(\?.*$|$)/,
loader: 'file-loader?name=/img/[name].[ext]'
},
// Images: png, gif, jpg, jpeg
{
test: /\.(png|gif|jpe?g)$/,
loader: 'file?name=/img/[name].[ext]'
},
// HTML: htm, html
{
test: /\.html?$/,
loader: "file?name=[name].[ext]"
},
// Font files: eot, ttf, woff, woff2
{
test: /\.(eot|ttf|woff2?)(\?.*$|$)/,
loader: 'file?name=/fonts/[name].[ext]'
}
]
},
output: {
path: './dist',
filename: 'bundle--[name].js'
},
plugins: [
// Pro-tip: Order matters here.
new webpack.optimize.CommonsChunkPlugin([‘myPages’, 'vendor'], 'bundle--[name].js'),
// Minify assets.
new webpack.optimize.UglifyJsPlugin({
compress: {
warnings: false // https://github.com/webpack/webpack/issues/1496
}
})
]
};
module.exports = config;