Migrating to Drupal From Alternate Sources
Migrating to Drupal From Alternate Sources
Joshua Turton | Senior Developer
November 1, 2018
Content migration is a topic with a lot of facets. We’ve already covered some important migration information on our blog:
- Drupal 8 Content Migration: A Guide For Marketers - What content should we migrate, and how do we organize and plan a migration?
- Estimating Drupal 8 Migration Scope - How long will all this take?
- The Top 5 Myths of Content Migration - Mistaken ideas, traps, gotchas, and mismanaged expectations.
- Managing Your Drupal 8 Migration - Key concepts, setting up the tools, and starting with a user migration.
- Drupal 8 Migrations: Taxonomy and Nodes - Migrate the bulk of Drupal content and classifications.
So far, readers of this series will have gotten lots of good process information, and learned how to move a Drupal 6 or 7 site into Drupal 8. This post, though, will cover what you do when your content is in some other data framework. If you haven’t read through the previous installments, I highly recommend you do so. We’ll be building on some of those concepts here.
Content Type Translation
One of the first steps of a Drupal to Drupal migration is setting up the content types in the destination site. But what do you do if you are moving to Drupal from another system? Well, you will need to do a little extra analysis in your discovery phase, but it’s very doable.
Most content management systems have at least some structure that is similar to Drupal’s node types, as well as a tag/classification/category system that is analogous to Drupal’s taxonomy. And it’s almost certain to have some sort of user account. So, the first part of your job is to figure out how all that works.
Is there only one ‘content type’, which is differentiated by some sort of tag (“Blog Post”, “Product Page”, etc.)? Well, then, each of those might be a different content type in Drupal. Are Editors and Writers stored in two different database tables? Well, you probably just discovered two different user roles, and will be putting both user types into Drupal users, but with different roles. Does your source site allow comments? That maps pretty closely to Drupal comments, but make sure that you actually want to migrate them before putting in the work! Drupal 8 Content Migration: A Guide For Marketers, one of the early posts in this series, can help you make that decision.
Most CMS systems will also have a set of meta-data that is pretty similar to Drupal’s: created, changed, author, status and so on. You should give some thought to how you will map those fields across as well. Note that author is often a reference to users, so you’ll need to consider migration order as well.
If your source data is not in a content management system (or you don’t have access to it), you may have to dig into the database directly. If you have received some or all of your content in the XML, CSV, or other text-type formats, you may just have to open the files and read them to see what you are working with.
In short, your job here will be to distill the non-Drupal conventions of your source site into a set of Drupal-compatible entity types, and then build them.
Migration from CSV
CSV is an acronym for “Comma-Separated Value”, and is a file format often used for transferring data in large quantity. If you get some of your data from a client in a spreadsheet, it’s wise to export it to CSV. This format strips all the MS Office or Google Sheets gobbledygook, and just gives you a straight block of data.
Currently, migrations of CSV files into Drupal use the Migrate Source CSV module. However, this module is being moved into core and deprecated. Check the Bring migrate_source_csv to core issue to see what the status on that is, and adjust this information accordingly.
The Migrate Source CSV module has a great example and some good documentation, so I’ll just touch on the highlights here.
First, know that CSV isn’t super-well structured, so each entity type will need to be a separate file. If you have a spreadsheet with multiple tabs, you will need to export each separately, as well.
Second, connecting to it is somewhat different than connecting to a Drupal database. Let’s take a look at the data and source configuration from the default example linked above.
migrate_source_csv/tests/modules/migrate_source_csv_test/artifacts/people.csv
id,first_name,last_name,email,country,ip_address,date_of_birth
1,Justin,Dean,jdean0@example.com,Indonesia,60.242.130.40,01/05/1955
2,Joan,Jordan,jjordan1@example.com,Thailand,137.230.209.171,10/14/1958
3,William,Ray,wray2@example.com,Germany,4.75.251.71,08/13/1962
migrate_source_csv/tests/modules/migrate_source_csv_test/config/install/migrate_plus.migration.migrate_csv.yml (Abbreviated)
...
source:
  plugin: csv
  path: /artifacts/people.csv
  keys:
    - id
  header_row_count: 1
  column_names:
    -
      id: Identifier
    -
      first_name: 'First Name'
    -
      last_name: 'Last Name'
    -
      email: 'Email Address'
    -
      country: Country
    -
      ip_address: 'IP Address'
    -
      date_of_birth: 'Date of Birth'
...
Note first that this migration is using plugin: csv, instead of the d7_node or d7_taxonomy_term that we’ve seen previously. This plugin is in the Migrate Source CSV module, and handles reading the data from the CSV file.
path: /artifacts/people.csv
The path config, as you can probably imagine, is the path to the file you’re migrating. In this case, the file is contained within the module itself.
keys:
  - id
The keys config is an array of columns that are the unique id of the data.
header_row_count: 1
  column_names:
   -
     id: Identifier
   -
     first_name: 'First Name'
   -
     last_name: 'Last Name'
...
These two configurations interact in an interesting way. If your data has a row of headers at the top, you will need to let Drupal know about it by setting a header_row_count. When you do that, Drupal will parse the header row into field ids, then move the file to the next line for actual data parsing.
However, if you set the column_names configuration, Drupal will override the field ids created when it parsed the header row. By passing only select field ids, you can skip fields entirely without having to edit the actual data. It also allows you to specify a human-readable field name for the column of data, which can be handy for your reference, or if you’re using Drupal Migrate’s admin interface.
You really should set at least one of these for each CSV migration.
The process configuration will treat these field ids exactly the same as a Drupal fieldname.
Process and Destination configuration for CSV files are pretty much the same as with a Drupal-to-Drupal import, and they are run with Drush exactly the same.
Migration from XML/RSS
XML’s a common data storage format, that presents data in a tagged format. Many content management systems or databases have an ‘export as xml’ option. One advantage XML has over CSV is that you can put multiple data types into a single file. Of course, if you have lots of data, this advantage could turn into a disadvantage as the file size balloons! Weigh your choice carefully.
The Migrate Plus module has a data parser for XMl, so if you’ve been following along with our series so far, you should already have this capability installed.
Much like CSV, you will have to connect to a file, rather than a database. RSS is a commonly used xml format, so we’ll walk through connecting to an RSS file for our example. I pulled some data from Phase2’s own blog RSS for our use, too.
https://www.phase2technology.com/ideas/rss.xml (Abbreviated)
<?xml version="1.0" encoding="utf-8"?>
<rss ... xml:base="https://www.phase2technology.com/ideas/rss.xml">
  <channel>
    <title>Phase2 Ideas</title>
    <link>https://www.phase2technology.com/ideas/rss.xml</link>
    <description/>
    <language>en</language>
        <item>
            <title>The Top 5 Myths of Content Migration *plus one bonus fairytale</title>
            <link>https://www.phase2technology.com/blog/top-5-myths-content</link>
            <description>The Top 5 Myths of Content Migration ... </description>
            <pubDate>Wed, 08 Aug 2018 14:23:34 +0000</pubDate>
            <dc:creator>Bonnie Strong</dc:creator>
            <guid isPermaLink="false">1304 at https://www.phase2technology.com</guid>
        </item>
    </channel>
</rss>
example_xml_migrate/config/install/migrate_plus.migration.example_xml_articles.yml
id: example_xml_articles
label: 'Import articles'
status: true
source:
  plugin: url
  data_fetcher_plugin: http
  urls: 'https://www.phase2technology.com/ideas/rss.xml'
  data_parser_plugin: simple_xml
  item_selector: /rss/channel/item
  fields:
    -
      name: guid
      label: GUID
      selector: guid
    -
      name: title
      label: Title
      selector: title
    -
      name: pub_date
      label: 'Publication date'
      selector: pubDate
    -
      name: link
      label: 'Origin link'
      selector: link
    -
      name: summary
      label: Summary
      selector: description
  ids:
    guid:
      type: string
destination:
  plugin: 'entity:node'
process:
  title:
    plugin: get
    source: title
  field_remote_url: link
  body: summary
  created:
    plugin: format_date
    from_format: 'D, d M Y H:i:s O'
    to_format: 'U'
    source: pub_date
  status:
    plugin: default_value
    default_value: 1
  type:
    plugin: default_value
    default_value: article
The key bits here are in the source configuration.
source:
  plugin: url
  data_fetcher_plugin: http
  urls: 'https://www.phase2technology.com/ideas/rss.xml'
  data_parser_plugin: simple_xml
  item_selector: /rss/channel/item
Much like CSV’s use of the csv plugin to read a file, XML is not using the d7_node or d7_taxonomy_term plugin to read the data. Instead, it’s pulling in a url and reading the data it finds there. The data_fetcher_plugin takes one of two different possible values, either http or file. HTTP is for a remote source, like an RSS feed, while File is for a local file. The urls config should be pretty obvious.
The data_parser_plugin specifies what php library to use to read and interpret the data. Possible parsers here include JSON, SOAP, XML and SimpleXML. SimpleXML’s a great library, so we’re using that here.
Finally, item_selector defines where in the XML the items we’re importing can be found. If you look at our data example above, you’ll see that the actual nodes are in rss -> channel -> item. Each node would be an item.
fields:
...
    -
      name: pub_date
      label: 'Publication date'
      selector: pubDate
...
Here you see one of the fields from the xml. The label is just a human-readable label for the field, while the selector is the field within the XML item we’re getting.
The name is what we’ll call a pseudo-field. A pseudo-fields acts as a temporary storage for data. When we get to the Process section, the pseudo-fields are treated essentially as though they were fields in a database.
We’ve seen pseudo-fields before, when we were migrating taxonomy fields in Drupal 8 Migrations: Taxonomy and Nodes. We will see why they are important here in a minute, but there’s one more important thing in source.
ids:
  guid:
    type: string
This snippet here sets the guid to be a unique of the article we’re importing. This guarantees us uniqueness and is very important to specify.
Finally, we get to the process section.
process:
...
  created:
    plugin: format_date
    from_format: 'D, d M Y H:i:s O'
    to_format: 'U'
    source: pub_date
...
So, here is where we’re using the pseudo-field we set up before. This takes the value from pubDate that we stored in the pseudo-field pub_date, does some formatting to it, and assigns it to the created field in Drupal. The rest of the fields are done in a similar fashion.
Destination is set up exactly like a Drupal-to-Drupal migration, and the whole thing is run with Drush the exact same way. Since RSS is a feed of real-time content, it would be easy to set up a cron job to run that drush command, add the --update flag, and have this migration go from one-time content import to being a regular update job that kept your site in sync with the source.
Migration from WordPress
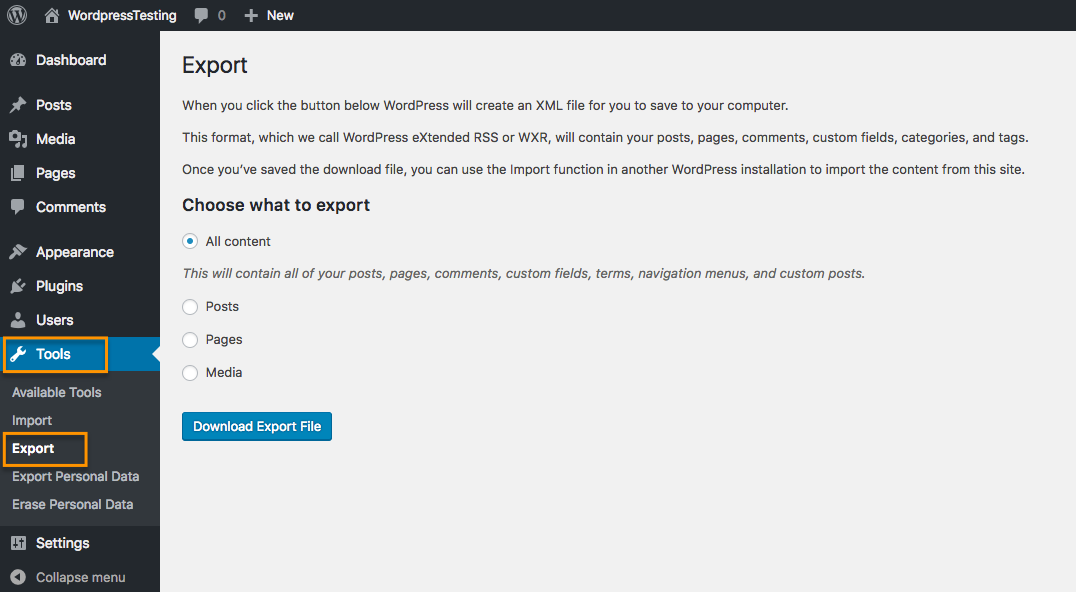
A common migration path is from WordPress to Drupal. Phase2 recently did so with our own site, and we have done it for clients as well. There are several ways to go about it, but our own migration used the WordPress Migrate module.
In your WordPress site, under Tools >> Export, you will find a tool to dump your site data into a customized xml format. You can also use the wp-cli tool to do it from the command line, if you like.
Once you have this file, it becomes your source for all the migrations. Here’s some good news: it’s an XML file, so working with it is very similar to working with RSS. The main difference is in how we specify our source connections.
example_wordpress_migrate/config/install/migrate_plus.migration.example_wordpress_authors.yml
langcode: en
status: true
dependencies:
  enforced:
    module:
      - phase2_migrate
id: example_wordpress_authors
class: null
field_plugin_method: null
cck_plugin_method: null
migration_tags:
  - example_wordpress
  - users
migration_group: example_wordpress_group
label: 'Import authors (users) from WordPress WXL file.'
source:
  plugin: url
  data_fetcher_plugin: file
  data_parser_plugin: xml
  item_selector: '/rss/channel/wp:author'
  namespaces:
    wp: 'http://wordpress.org/export/1.2/'
    excerpt: 'http://wordpress.org/export/1.2/excerpt/'
    content: 'http://purl.org/rss/1.0/modules/content/'
    wfw: 'http://wellformedweb.org/CommentAPI/
    dc: 'http://purl.org/dc/elements/1.1/'
  urls:
    - 'private://example_output.wordpress.2018-01-31.000.xml'
  fields:
    -
      name: author_login
      label: 'WordPress username'
      selector: 'wp:author_login'
    -
      name: author_email
      label: 'WordPress email address'
      selector: 'wp:author_email'
    -
      name: author_display_name
      label: 'WordPress display name (defaults to username)'
      selector: 'wp:author_display_name'
    -
      name: author_first_name
      label: 'WordPress author first name'
      selector: 'wp:author_first_name'
    -
      name: author_last_name
      label: 'WordPress author last name'
      selector: 'wp:author_last_name'
  ids:
    author_login:
      type: string
process:
  name:
    plugin: get
    source: author_login
  mail:
    plugin: get
    source: author_email
  field_display_name
    plugin: get
    source: author_display_name
  field_first_name:
    plugin: get
    source: author_first_name
  field_last_name:
    plugin: get
    source: author_last_name
  status:
    plugin: default_value
    default_value: 0
destination:
  plugin: 'entity:user'
migration_dependencies: null
If you’ve been following along in our series, a lot of this should look familiar.
source:
  plugin: url
  data_fetcher_plugin: file
  data_parser_plugin: xml
  item_selector: '/rss/channel/wp:author'
This section works just exactly like the XML RSS example above. Instead of using http, we are using file for the data_fetcher_plugin, so it looks for a local file instead of making an http request. Additionally, due to the difference in the structure of an RSS feed compared to a WordPress WXL file, the item_selector is different, but it works the same way.
namespaces:
  wp: 'http://wordpress.org/export/1.2/'
  excerpt: 'http://wordpress.org/export/1.2/excerpt/'
  content: 'http://purl.org/rss/1.0/modules/content/'
  wfw: 'http://wellformedweb.org/CommentAPI/'
  dc: 'http://purl.org/dc/elements/1.1/'
These namespace designations allow Drupal’s xml parser to understand the particular brand and format of the Wordpress export.
urls:
  - 'private://example_output.wordpress.2018-01-31.000.xml'[/php]
Finally, this is the path to your export file. Note that it is in the private filespace for Drupal, so you will need to have private file management configured in your Drupal site before you can use it.
fields:
  -
    name: author_login
    label: 'WordPress username'
    selector: 'wp:author_login'
We’re also setting up pseudo-fields again, storing the value from wp:author_login in author_login.
Finally, we get to the process section.
process:
  name:
    plugin: get
    source: author_login
So, here is where we’re using the pseudo-field we set up before. This takes the value from wp:author_login that we stored in author_login and assigns it to the name field in Drupal.
Configuration for the migration of the rest of the entities - categories, tags, posts, and pages - look pretty much the same. The main difference is that the source will change slightly:
example_wordpress_migrate/config/install/migrate_plus.migration.example_wordpress_category.yml (abbreviated)
source:
  ...
  item_selector: '/rss/channel/wp:category'
example_wordpress_migrate/config/install/migrate_plus.migration.example_wordpress_tag.yml (abbreviated)
source:
  ...
  item_selector: '/rss/channel/wp:tag'
example_wordpress_migrate/config/install/migrate_plus.migration.example_wordpress_post.yml (abbreviated)
source:
  ...
  item_selector: '/rss/channel/item[wp:post_type="post"]'
And, just like our previous two examples, Wordpress migrations can be run with Drush.
A cautionary tale
As we noted in Managing Your Drupal 8 Migration, it’s possible to write custom Process Plugins. Depending on your data structure, it may be necessary to write a couple to handle values in these fields. On the migration of Phase2’s site recently, after doing a baseline test migration of our content, we discovered a ton of malformed links and media entities. So, we wrote a process plugin that did a bunch of preg_replace to clean up links, file paths, and code formatting in our body content. This was chained with the default get plugin like so:
process:
  body/value:
    -
      plugin: get
      source: content
    -
      plugin: p2body
The plugin itself is a pretty custom bit of work, so I’m not including it here. However, a post on custom plugins for migration is in the works, so stay tuned.
Useful Resources and References
- Migrate Source Plugins documentation: https://www.drupal.org/docs/8/api/migrate-api/migrate-source-plugins
- Stop Waiting for Feeds Module (Use Migrate for XML/RSS): https://ohthehugemanatee.org/blog/2017/06/07/stop-waiting-for-feeds-module-how-to-import-remote-feeds-in-drupal-8/
- Migrate Plus module: https://www.drupal.org/project/migrate_plus
- Migrate Source CSV module: https://www.drupal.org/project/migrate_source_csv
If you’ve enjoyed this series so far, we think you might enjoy a live version, too! Please drop by our session proposal for Drupalcon Seattle, Moving Out, Moving In! Migrating Content to Drupal 8 and leave some positive comments.